

Why Drip Irrigation Is Worth the Setup Effort
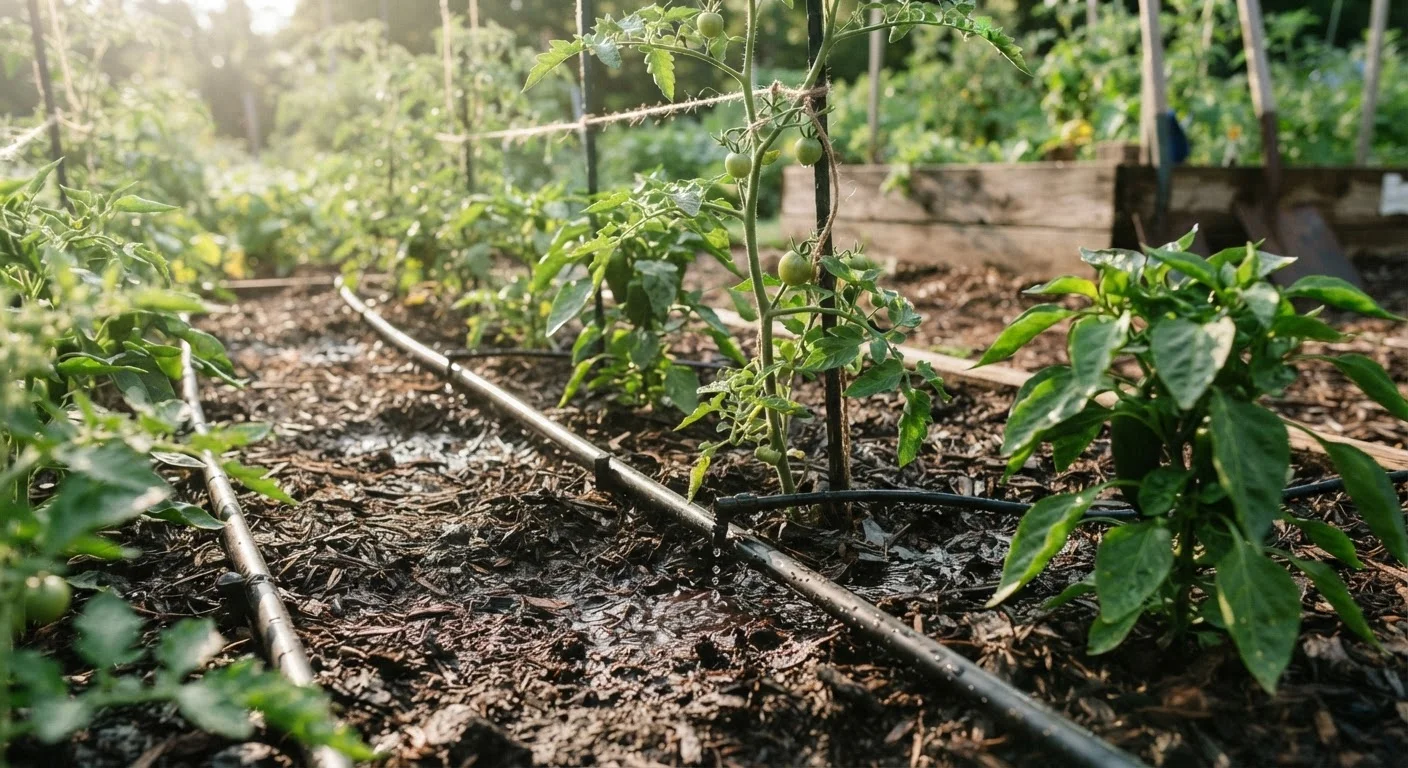
Overhead sprinklers wet everything - foliage, soil surface, pathways - and a significant portion of that water evaporates before plant roots ever see it. Drip irrigation takes a different approach: it delivers water slowly and directly to the root zone of each plant, a few drops at a time.
The practical payoff is real. Less water sits on leaves, which means fewer conditions that encourage fungal diseases like powdery mildew. Roots receive a consistent, slow supply that encourages deeper growth rather than shallow surface feeding. And because water isn't scattered across the whole bed, weeds between plants get less encouragement to germinate.
If you're already thinking about what to grow, our guide to starting your first vegetable garden pairs well with this one - a drip system makes managing a new garden significantly less stressful. The same goes if you're planning raised beds versus in-ground planting, since drip lines work well in both configurations.
The Core Components You'll Need
A drip system has more parts than a garden hose, but each one has a clear purpose. Here's what a basic setup includes:
- Backflow preventer: Attaches directly to the hose bib. It keeps irrigation water from siphoning back into your household supply. Many municipalities require one by code.
- Pressure regulator: Municipal water pressure is often too high for drip emitters, which are designed to operate around 15-30 PSI. A regulator drops pressure to the right range and prevents tubing from popping off fittings.
- Filter: Sediment in your water supply can clog emitters quickly. A mesh filter (typically 150-200 mesh) is installed inline and keeps debris out.
- Timer (optional but recommended): A battery-operated hose-end timer automates watering so you don't have to remember to turn it on and off manually.
- Header tubing (main line): Half-inch polyethylene tubing runs from the spigot connection to your garden. This is the backbone of the system.
- Emitter tubing or drip tape: Quarter-inch tubing branches off the header to individual plants, or drip tape runs the length of a row with pre-spaced emitters.
- Emitters: These are the small fittings that control flow rate - commonly 0.5, 1, or 2 gallons per hour. Match the rate to what each plant needs.
- End caps and hole punch: End caps close off tubing runs; a punch tool creates the holes where emitter tubing connects to the header.
When assembling the head unit, hand-tighten only - over-tightening plastic fittings at the hose bib can crack the housing of a pressure regulator or backflow preventer, causing a slow drip that wastes water all season.
Plastic fittings are designed to seal with hand pressure and a single quarter-turn; applying wrench force is one of the most common causes of cracked regulators that experienced gardeners learn to avoid.
Before permanently staking down tubing, run the system once with everything loosely placed and watch where water actually lands - then adjust emitter positions before anchoring anything.
Water distribution in the soil often differs from what a diagram suggests, especially in mixed or amended soils. A dry run before committing to placement prevents rework.
Planning Your Layout Before You Buy Anything
The most common mistake first-timers make is buying components without a plan. Before you go shopping, draw a rough sketch of your garden area on paper - it doesn't need to be precise, just functional.
Note where your water source is and measure the approximate distance to your farthest plants. Mark where each plant or row sits and how many emitters you'll need. A single tomato plant typically needs one emitter; a 10-foot row of lettuce might use drip tape with emitters every 6-12 inches.
Think about whether your garden is all in one area or split across multiple beds. If it's spread out, you may want a multi-outlet manifold at the head so you can run separate lines to different zones. Keep header tubing runs under 200 feet to maintain consistent pressure throughout.
Also consider your soil type. Sandy soil lets water spread outward less, so emitters need to be spaced closer together. Clay soil absorbs water slowly and spreads it more, so emitters can be spaced farther apart. If you're working on container gardening, individual emitters per pot are usually the cleanest solution.
Installing the System Step by Step
Once you have your parts and a layout plan, installation is straightforward. Follow this general sequence:
- Connect the head assembly at the hose bib: backflow preventer first, then the filter, then the pressure regulator, then the timer if you're using one.
- Run the header tubing from the spigot to your garden area. Use stakes to hold tubing in place along the ground. Avoid sharp bends, which restrict flow.
- Punch holes in the header tubing at each point where you want to branch off to a plant or row. Use the correct punch tool - improvised holes with a nail or knife tend to leak.
- Insert barbed fittings into each hole and connect quarter-inch tubing or drip tape to them.
- Place emitters at each plant's root zone, generally a few inches away from the stem rather than right up against it.
- Cap all open ends of tubing runs to maintain pressure.
- Turn the system on and walk the entire line. Look for leaks at fittings, check that every emitter is dripping, and watch for tubing that has popped off a connector.
Bad watering habits - like running a system too long or at the wrong time of day - can undermine even a well-installed drip system. Aim to water in the early morning when evaporation is lowest.
Common First-Timer Mistakes to Avoid
Don't Skip the Backflow Preventer
A backflow preventer is not optional in most jurisdictions - it's a code requirement. Without it, fertilizers or soil contaminants drawn into the irrigation line can potentially siphon into your household water supply. Check your local plumbing code before connecting any irrigation system to a hose bib.
Beyond skipping the planning phase, a few specific errors trip up most beginners:
- Skipping the pressure regulator: Without it, high pressure can blow emitters off tubing or cause fittings to leak constantly.
- Buying the wrong emitter flow rate: A 2 GPH emitter on a shallow-rooted herb in sandy soil will likely waterlog it. Match flow rate to plant water needs and your soil's absorption speed.
- Leaving tubing unanchored: Tubing that isn't staked down moves around, pulling emitters away from root zones. Use landscape staples or tubing stakes generously.
- Ignoring the filter: Even if your tap water looks clean, sediment builds up over time. Clean the filter at the start of each season and midway through if you're in a dusty area.
- Running lines too long: Pressure drops over distance. If plants at the far end of a long run seem dry while nearby plants are fine, your header tubing run may be too long for your water pressure.
For plants that naturally need less frequent watering, such as drought-tolerant varieties, a drip system can still be used - just program the timer less frequently. See our notes on low-maintenance plants for busy yards for plant types that pair well with infrequent irrigation schedules.
Seasonal Maintenance and Winterizing
A drip system that isn't properly maintained will develop clogged emitters, cracked tubing, and leaking fittings over time. A simple routine prevents most of that.
During the season: Flush the system by briefly removing end caps and running water through the lines every month or two. This pushes out any sediment that's accumulated. Check emitters periodically to confirm they're all flowing - a plant that looks drought-stressed when everything around it is thriving often has a clogged or dislodged emitter.
At the end of the season: Before the first hard freeze, drain and store the system. Turn off the water supply, remove the timer and head assembly, and drain all the tubing by opening end caps and letting gravity do the work. Polyethylene tubing can survive mild freezes if empty, but water left inside can crack fittings and split tubing as it expands. In very cold climates, bringing header tubing indoors for winter extends its lifespan considerably.
With basic upkeep, a quality drip system can last many seasons and pay back its setup cost in reduced water bills and healthier plants.
The content on this site is for informational purposes only and is not a substitute for professional advice. Always consult a qualified professional for guidance specific to your situation.