

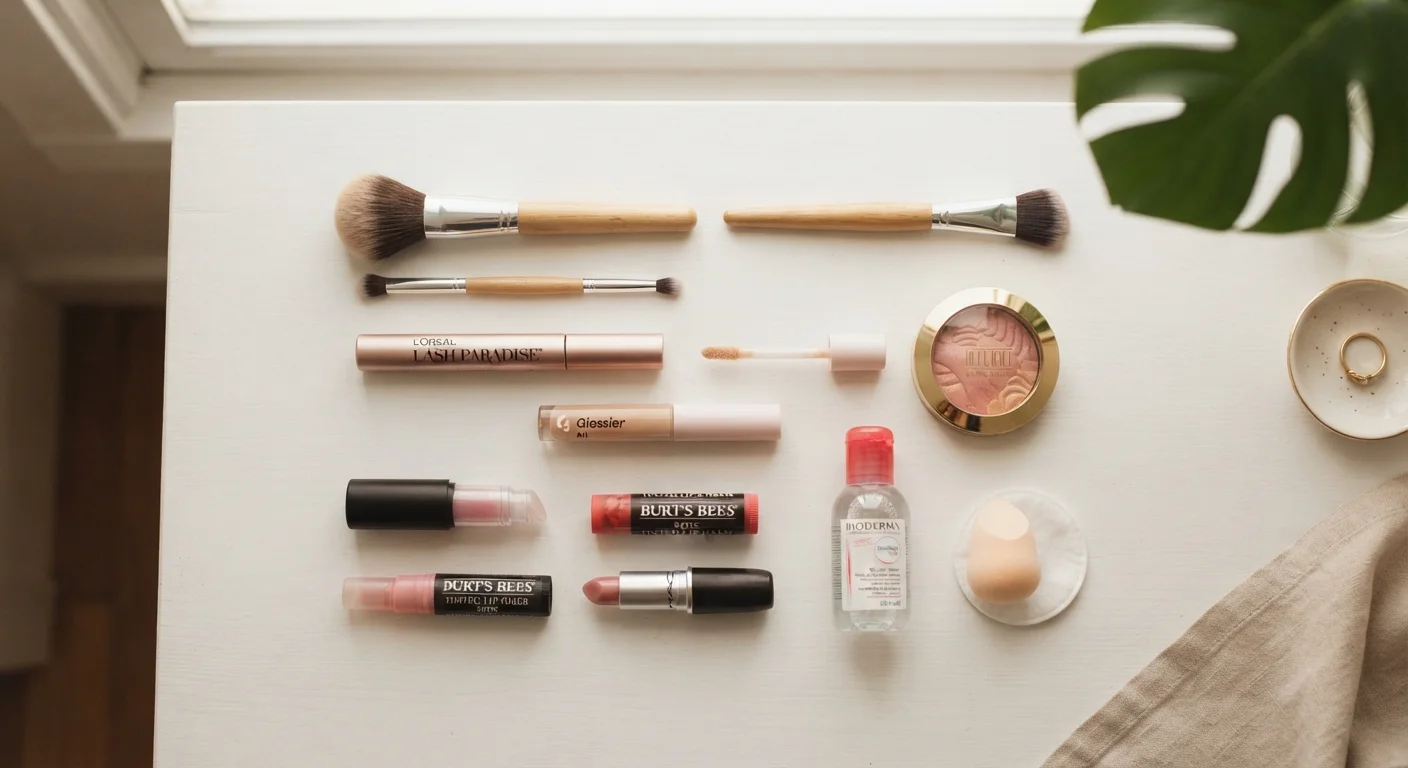
Start here
Why Less Is More When Starting Out
Next
The Core Products Worth Starting With
Then
Tools That Actually Make a Difference
Apply it
Application Basics: A Simple Order to Follow
Protect your skin
Keeping Your Skin Happy While You Experiment
Why Less Is More When Starting Out
Walk into any beauty store and the sheer volume of products — setting sprays, color correctors, baking powders — can make makeup feel like a professional skill requiring years of training. It isn't. The beauty industry benefits from complexity, but you don't have to buy into it from day one.
A solid beginner kit is intentionally small: five to seven versatile products that build on each other. Starting lean helps you actually learn what each product does, notice what suits your skin, and build confidence without wasting money on things you'll never use. Think of it as learning a recipe before stocking a full kitchen.
Resist the urge to buy everything at once
A common beginner mistake is purchasing a large haul before knowing what you actually need. Start with three to four products, use them for a few weeks, then decide what's missing. You'll waste far less and learn much faster.
The Core Products Worth Starting With
Here's a practical starting lineup and what each item actually does:
Tinted moisturizer
A lightweight lotion that combines skincare hydration with a sheer hint of color, offering much less coverage than foundation but being easier to apply and blend.
Concealer
A thicker, more pigmented product used to cover specific areas like dark circles or blemishes rather than the entire face.
Setting powder
A fine, translucent or tinted powder pressed or dusted over makeup to reduce shine and help other products stay in place longer.
Blending sponge
A soft, egg-shaped foam tool used damp to press and blend liquid or cream makeup into the skin for a smooth, natural finish.
Coverage
How much of your natural skin tone and texture a base product conceals — ranging from sheer (barely there) to full (more opaque).
Cream formula
A product with a soft, creamy texture — as opposed to powder or liquid — that typically blends easily with fingers and works well on a range of skin types.
- Tinted moisturizer or light foundation — Evens out skin tone with a sheer-to-light finish. Tinted moisturizers are more forgiving and faster to apply, making them ideal for beginners.
- Concealer — Targets specific spots: under-eye shadows, blemishes, or redness around the nose. A shade that matches your skin or is very slightly lighter works best.
- Cream blush — Adds warmth and dimension. Cream formulas blend easily with fingers, no brush required, and suit a wide range of skin types.
- Mascara — Opens up the eyes more than almost any other single product. One coat of a basic lengthening or volumizing formula goes a long way.
- Tinted lip balm — Gives a hint of color while keeping lips comfortable. It's the most low-maintenance lip option and easy to reapply throughout the day.
Optional additions once you're comfortable: a brow pencil or gel (filled-in brows frame the face noticeably) and a pressed powder if you tend to get oily by midday.
Tools That Actually Make a Difference
Products are only part of the equation — the right tools change how everything looks and how long it takes. You don't need a 20-piece brush set.
- Damp blending sponge — Presses and blends base products into the skin for a natural, skin-like finish. Dampen it before use so it doesn't absorb too much product.
- Fluffy powder brush — Useful if you use setting powder. Also works for loose blush application.
- Small blending brush — Handy for blending eyeshadow or concealer around the eye area.
- Clean fingertips — Genuinely useful for cream blush, lip products, and blending concealer. Don't underestimate them.
Keep tools clean — wash sponges weekly and brushes every two weeks. Dirty tools spread bacteria and make blending harder.
Application Basics: A Simple Order to Follow
Order matters because each layer affects the next. Here's a straightforward sequence that prevents smearing and keeps everything looking intentional:
- Skincare first — Cleanser, moisturizer, SPF. Makeup applies more smoothly over hydrated skin. If you haven't built a skincare routine yet, see our guide to building a simple skincare routine for the basics.
- Base — Apply tinted moisturizer or foundation using a damp sponge, blending outward from the center of the face.
- Concealer — Dot on and blend after your base, not before. This uses less product and gives a more natural result.
- Eyes — Mascara and any eyeshadow before blush, so any fallout powder can be cleaned up without disrupting your cheek color.
- Blush — Smile lightly and apply cream blush to the apples of the cheeks, blending upward toward the temples.
- Lips — Tinted lip balm last, so you can assess the full look before adding color.
Wondering if primer fits into this routine? Our honest breakdown of what primer actually does explains when — and whether — it's worth adding.
Primer is optional at the beginner stage
Many tutorials include primer as a step, but it's genuinely not essential when you're starting out. A good moisturizer provides a solid enough base for everyday looks. If you're curious about whether primer is worth adding later, it's worth researching once you've gotten comfortable with the core steps.
Keeping Your Skin Happy While You Experiment
New makeup products can occasionally cause reactions, especially if your skin is sensitive. The safest approach is to introduce one new product at a time, giving your skin a few days to adjust before adding another. This makes it straightforward to identify anything that doesn't agree with you.
Always remove makeup before bed — sleeping in it can clog pores and irritate skin over time. A gentle cleansing balm or micellar water removes most makeup effectively without harsh scrubbing. For a structured way to approach any new product addition, our checklist for switching to new skincare products safely applies equally well to makeup.
Building a first makeup kit is genuinely exciting — it's permission to experiment with self-expression on your own terms. Keep it simple, stay curious, and remember that even experienced makeup enthusiasts are still learning what works for them.
This article is for general informational purposes only and is not intended as medical or dermatological advice. If you experience persistent skin reactions, consult a qualified healthcare professional.
Frequently Asked Questions
Start with a concealer, a tinted moisturizer or light foundation, mascara, a cream blush, and a tinted lip balm. These five items cover most looks and are the most forgiving for beginners. You can always add more once you feel comfortable.
No — mid-range brushes work well for beginners. What matters more than price is cleanliness and the right brush shape for the job. A blending sponge and two or three brushes cover most needs.
Test shades along your jawline in natural light — the right shade should blend in without a visible line. Many beauty counters offer shade-matching help, and some drugstores have return policies that make experimenting lower risk.
Begin with skincare, then SPF, then any base product like tinted moisturizer or foundation, concealer, eye makeup, blush, and finish with lip color. Setting powder is optional. This order prevents smearing and keeps each layer intact.
Some products can clog pores or irritate sensitive skin, especially if you're new to wearing makeup. Introducing one product at a time and thoroughly removing makeup before bed significantly reduces this risk. Our checklist for switching skincare products safely applies here too.
Primer is not essential when you're starting out. It can extend wear and smooth texture, but a good moisturizer often does enough for everyday looks. Learn more about whether it's worth it for your routine once you've mastered the basics.
The content on this site is for informational purposes only and is not a substitute for professional advice. Always consult a qualified professional for guidance specific to your situation.