

Why a Running Toilet Deserves Attention
That faint hissing or trickling sound coming from your bathroom isn't just a nuisance - it's water and money going straight down the drain. A continuously running toilet can waste anywhere from 20 to over 200 gallons per day, depending on the cause and severity. Over a month, that adds up to a meaningful spike on your water bill and unnecessary strain on local water systems.
The good news: most running toilets are caused by one of three straightforward issues - a worn flapper, a malfunctioning fill valve, or an out-of-adjustment float. Each one is diagnosable without any special knowledge, and most repairs are well within reach for the average homeowner.
Before you call a plumber, it's worth spending a few minutes with the tank lid off to see what's actually going on.
Do the Dye Test If You're Not Sure
If you suspect a slow flapper leak but can't hear it clearly, drop a few drops of food coloring into the tank and wait 10 minutes without flushing. If color appears in the bowl, your flapper isn't sealing. This simple trick removes all guesswork.
What You'll Need Before You Start
This is a low-tool repair. Gather the following before you begin:
What you will need
Replacement flapper
Seals the flush valve opening; the most common part that causes a running toilet.
Replacement fill valve
Controls the water level in the tank; needed if adjusting the float doesn't stop overfilling.
Adjustable pliers or channel-lock pliers
Used to loosen and tighten the locknut when replacing the fill valve.
Old towels or a small bucket
Catches drips when disconnecting the water supply line.
How to Diagnose and Fix a Running Toilet
Follow these steps in order. Many running toilets are fixed at step two or three - you may not need to go all the way through.
Remove the tank lid and observe
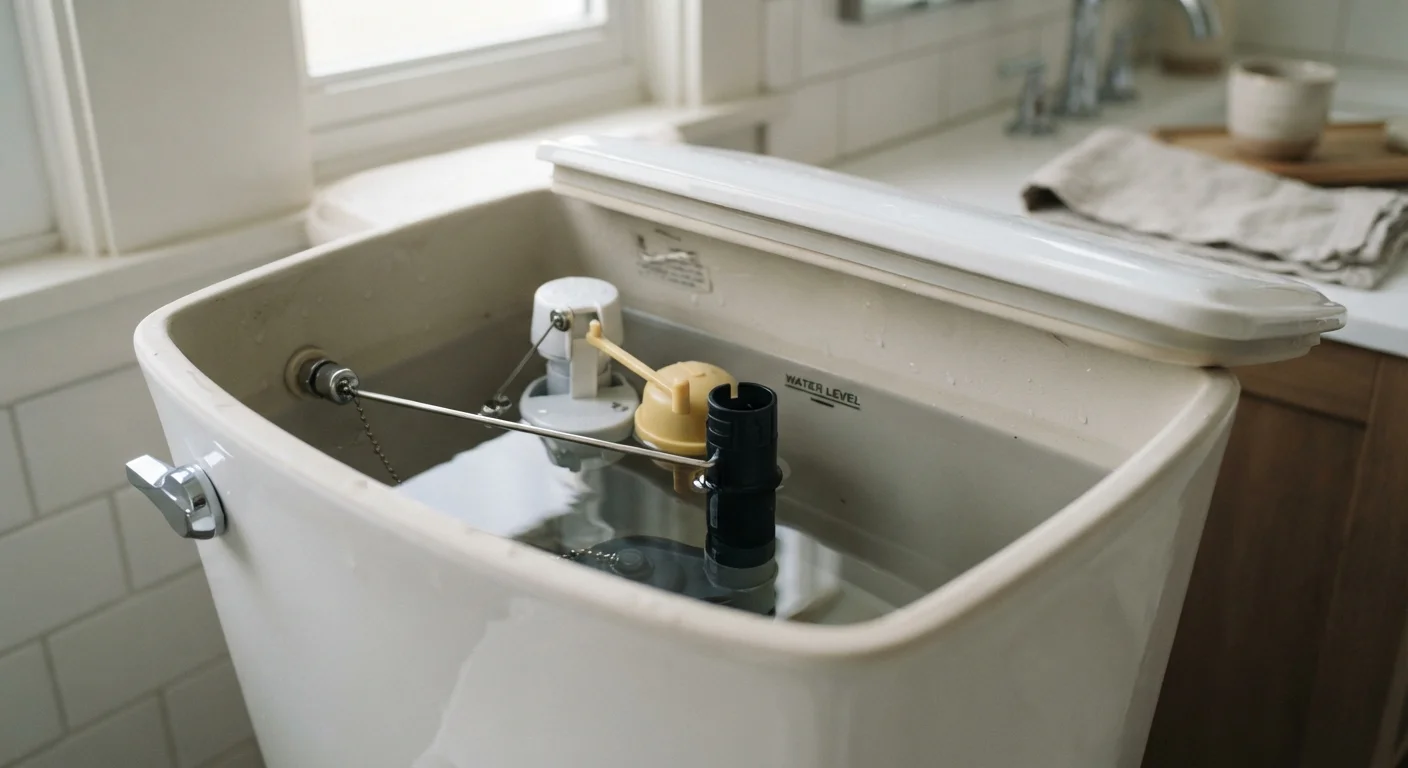
Carefully lift the porcelain lid off the toilet tank and set it flat on a stable surface - it's heavy and chips easily. Watch the inside of the tank for 30 seconds. You're looking for three things:
- Is water spilling into the overflow tube (the tall open-topped pipe in the center)?
- Is the flapper at the bottom of the tank sitting flat and sealed?
- Is the float sitting at a normal height or riding very high?
What you observe here will point you toward the right fix.
Check and replace the flapper
The flapper is the rubber seal at the bottom of the tank. When it wears out or warps, it lets water trickle continuously into the bowl. To test it, press down firmly on the flapper with your finger. If the running stops immediately, the flapper is the culprit.
To replace it:
- Turn off the water supply valve behind or beneath the toilet by turning it clockwise.
- Flush to empty the tank.
- Unhook the flapper from the pegs on either side of the flush valve and detach the chain from the flush handle arm.
- Take the old flapper to a hardware store to match the size, or note your toilet's brand and model to find the right fit.
- Snap the new flapper onto the pegs, reattach the chain (leaving about half an inch of slack), and turn the water back on.
Adjust or replace the fill valve
If water is spilling into the overflow tube, the tank is overfilling - usually because the fill valve or float isn't shutting the water off at the right level. The water level should sit about one inch below the top of the overflow tube.
On ballcock-style valves (older, with a ball float on an arm), bend the arm slightly downward or turn the adjustment screw to lower the float. On modern tower-style fill valves, pinch the adjustment clip and slide it down, or turn the top of the valve counterclockwise.
If adjusting doesn't help, replace the fill valve entirely. Replacement valves are widely available and come with installation instructions. Turn off the supply, flush, disconnect the supply line, unscrew the locknut under the tank, and swap in the new valve.
Test and confirm the fix
Once you've made your repair, turn the water supply back on and let the tank fill completely. Listen carefully and watch the tank for two to three minutes. The fill valve should shut off cleanly when the water reaches the correct level, and no water should be trickling into the bowl.
Flush once and observe the full cycle - the flapper should drop and seal promptly after the flush, and the fill valve should stop running once the tank is full.
When to Stop and Call a Plumber
Most running toilet repairs are DIY-friendly, but there are a few situations where it makes sense to hand things off to a licensed plumber:
- The toilet keeps running after replacing both the flapper and fill valve. This can point to a crack in the overflow tube, a damaged flush valve seat, or an issue with the supply line.
- You notice water on the floor around the base of the toilet. This may indicate a wax ring failure or a cracked porcelain base - neither of which is a simple fix.
- The toilet is very old and parts are hard to source. Replacement may be more practical than ongoing repairs.
Water waste from plumbing issues is similar in spirit to the kind of slow damage that happens when watering habits go wrong in the garden - small oversights that quietly compound. If you're thinking about resource efficiency at home, our article on watering habits that quietly kill healthy garden plants covers how to be more intentional with water use outdoors too.
The content on this site is for informational purposes only and is not a substitute for professional advice. Always consult a qualified professional for guidance specific to your situation.