

Start here
What Kind of Damage Are You Dealing With?
Gather supplies
Tools and Supplies You'll Actually Need
Do the repair
How to Patch Small Holes and Nail Pops
Bigger damage
Tackling Medium Holes (Fist-Sized and Smaller)
Finish it
Sanding, Priming, and Painting the Patch
Know your limits
When to Call a Pro Instead
What Kind of Damage Are You Dealing With?
Before buying anything, take a close look at your wall. Drywall damage falls into a few clear categories, and each one calls for a slightly different approach.
- Nail holes and screw dimples: Small punctures left by picture hooks or furniture anchors. Easiest to fix.
- Nail pops: Fasteners that have worked loose and pushed the drywall surface outward, creating a small bump or crack.
- Dents and scuffs: Surface damage that didn't punch all the way through the panel.
- Small holes (up to about 4 inches): Think doorknob strikes or accidental elbows. Require a backing or patch kit.
- Medium holes (4-6 inches): Need a more structured repair with a backer board or clip system.
Knowing what you're dealing with keeps you from overbuying supplies or underestimating the job.
Joint compound
A soft, paste-like filler used to smooth over drywall repairs and seams. It dries hard and can be sanded smooth. Also called drywall mud.
Feathering
Gradually thinning the edges of joint compound as you spread it outward so the patch blends invisibly into the surrounding wall surface.
Nail pop
A fastener - nail or screw - that has worked loose from a wall stud over time, pushing the drywall surface outward and creating a visible bump.
Primer-sealer
A preparatory coat applied before paint that seals porous surfaces like joint compound so paint absorbs evenly and the finish looks uniform.
Backer board
A piece of wood or metal placed behind a hole in drywall to give the patch something solid to attach to.
Mesh tape
Self-adhesive fiberglass tape used to reinforce joints and seams in drywall before applying joint compound.
Tools and Supplies You'll Actually Need
You don't need a contractor's truck bed of tools. Here's what covers most beginner repairs:
- Joint compound (also called drywall mud) - a premixed container works best for first-timers
- Putty knife or drywall knife - a 4- to 6-inch flexible blade for small repairs
- Self-adhesive mesh patch or a patch kit for holes larger than a nail hole
- Sandpaper - 120-grit for shaping, 220-grit for final smoothing
- Drywall primer-sealer
- Paint that matches your wall color
- Damp cloth for cleaning the repair area before you start
For nail pops, add a drywall screw and a drill or screwdriver. Most hardware stores stock small quantities of everything listed here, so you're not committed to large amounts on a first attempt.
How to Patch Small Holes and Nail Pops
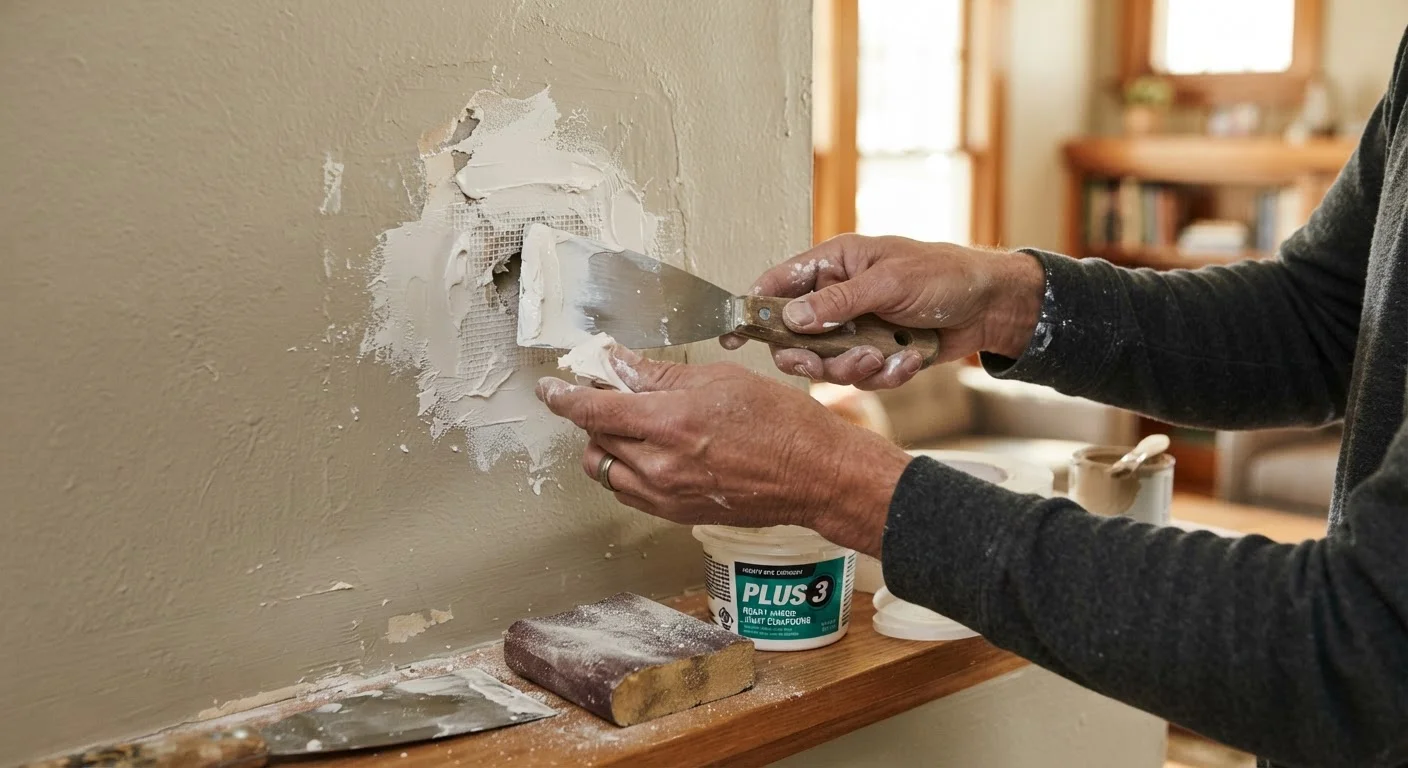
For nail holes and small dings: Wipe the area clean. Apply a thin layer of joint compound with your putty knife, pressing it firmly into the hole and feathering the edges outward so there's no ridge. Let it dry completely - typically 24 hours - then sand lightly until flush. Most small holes need two coats because compound shrinks slightly as it dries.
For nail pops: Drive a new drywall screw about two inches above the pop and another two inches below it. This pulls the panel snug against the stud. Then either drive the old nail flush with a hammer or remove it entirely. You'll have two or three small dimples to fill - treat each one like a regular screw hole, applying compound in thin coats.
Apply Compound in Thin Layers
Thick applications of joint compound crack and shrink unpredictably as they dry. Instead, apply thin, smooth layers and plan for at least two coats on any repair. The extra patience saves you from having to start over - and the result looks noticeably better.
In both cases, resist the urge to glob on thick compound all at once. Thin, patient coats are the real secret to a smooth result.
Tackling Medium Holes (Fist-Sized and Smaller)
Holes between roughly two and six inches need something behind them to hold the compound. A self-adhesive aluminum mesh patch is the simplest option for holes on the smaller end of that range - peel, stick, and apply compound over the mesh in thin layers, feathering well beyond the edges.
For holes closer to six inches, a backer board gives a more solid result. Cut a piece of wood slightly wider than the hole, slip it inside the wall, and hold it in place with drywall screws driven through the existing drywall on either side of the hole. Then cut a drywall piece to fit the opening, screw it to the backer, apply mesh tape over the seams, and skim with joint compound. Plan on three coats of compound for seams like these.
Whichever method you use, let each coat dry fully and sand between coats. Running your palm over the patch is a reliable check - if you can feel a ridge or bump, it needs more sanding before the next coat goes on.
Sanding, Priming, and Painting the Patch
Once your final coat is dry, sand the patch smooth using 120-grit paper, then finish with 220-grit. Wipe away all dust with a barely damp cloth and let the area dry.
Apply a coat of drywall primer-sealer to the patched area. This step is not optional - bare joint compound is porous and will absorb paint unevenly, making the patch visible even after painting. Let the primer dry per its label directions.
Now paint. If your wall has a texture - orange peel, knock-down, or skip-trowel - you'll want to replicate it before priming. Aerosol texture sprays can approximate common patterns; always test on a piece of cardboard first and apply in short, light passes from the distance recommended on the can.
If the wall color has faded or you can't find an exact match, plan to paint the entire wall rather than spot-painting. A patch painted with a slightly different shade stands out more than the original repair ever would have.
For an honest look at when DIY repair makes sense versus when a professional would serve you better, see our guide to DIY trade-offs.
When to Call a Pro Instead
Drywall repair is genuinely approachable for most cosmetic damage, but there are situations where calling a licensed professional is the smarter move:
- Large holes or extensive damage - anything bigger than about six inches becomes significantly harder to make invisible without experience.
- Water damage - if the drywall is soft, crumbling, or stained from a leak, the underlying moisture problem must be resolved first. Patching over wet or mold-affected drywall can cause bigger problems down the line.
- Cracks along seams or corners - recurring cracks may point to structural movement or settling that a cosmetic fix won't address.
- Anything near electrical wiring, plumbing, or gas lines - don't cut into a wall without knowing what's behind it. If you're not certain, a professional can assess safely.
Drywall repair is one of those skills that genuinely gets easier with practice. Starting with a small, low-visibility hole - inside a closet, for instance - is a low-stakes way to build confidence before tackling a prominent living-room wall.
Frequently Asked Questions
Typical drying time is 24 hours per coat under normal indoor conditions. High humidity or thick applications can extend that. The compound will change from dark to uniformly white or light gray when it's ready to sand.
Yes - skipping primer is the most common reason patches look shiny or blotchy after painting. A coat of drywall primer-sealer lets topcoat paint absorb evenly and match the surrounding wall.
Spackle works well for tiny nail holes and shallow dings. For anything larger, joint compound (also called drywall mud) is more durable and sands more smoothly.
Drive a new drywall screw about two inches above and below the popped nail to pull the panel tight, then drive the old nail flush or slightly recessed. Cover both dimples with two thin coats of joint compound.
For a smooth wall, careful sanding is enough. For orange-peel or knock-down texture, aerosol texture sprays can approximate common patterns - test on cardboard first and apply in thin, light passes.
For cosmetic repairs - holes, cracks, scuffs - yes. Avoid opening walls near electrical panels or supply lines without shutting off power or water first, and consult a licensed professional if you're unsure what's behind the wall.
The content on this site is for informational purposes only and is not a substitute for professional advice. Always consult a qualified professional for guidance specific to your situation.